Choosing a Precision Humidity Sensor is not a simple matter of comparing accuracy percentages. Real applications expose weaknesses that product brochures often hide. A sensor may perform well in a laboratory, yet drift inside a warm greenhouse, pharmaceutical chamber, or dusty warehouse. Temperature changes, condensation, airflow, chemical vapors, and poor installation can all distort readings.
Dr. Mark G. Lawrence, a respected humidity researcher, explains the core issue clearly: “Relative humidity is the ratio of the actual water vapor pressure to the saturation vapor pressure at a given temperature.” This principle matters because humidity readings depend strongly on temperature. A sensor placed beside a heater may report a different value from one mounted near a cool wall. Small errors can damage stored materials, affect product consistency, or trigger unnecessary alarms.
This guide explores seven practical considerations for selecting a Precision Humidity Sensor. It examines accuracy, operating range, response time, calibration, sensor stability, environmental resistance, and total ownership cost. These details deserve close attention. Accuracy alone is not enough.
Look beyond the datasheet.
A reliable choice should match the measurement environment, not merely the purchasing specification. For example, a fast-response sensor may be valuable in a drying process, while long-term stability may matter more in a museum display case. Calibration records should be traceable, and installation instructions should be realistic for daily maintenance. Some recommendations may seem obvious, but they are easy to overlook under budget pressure. That is where many otherwise careful decisions become imperfect.
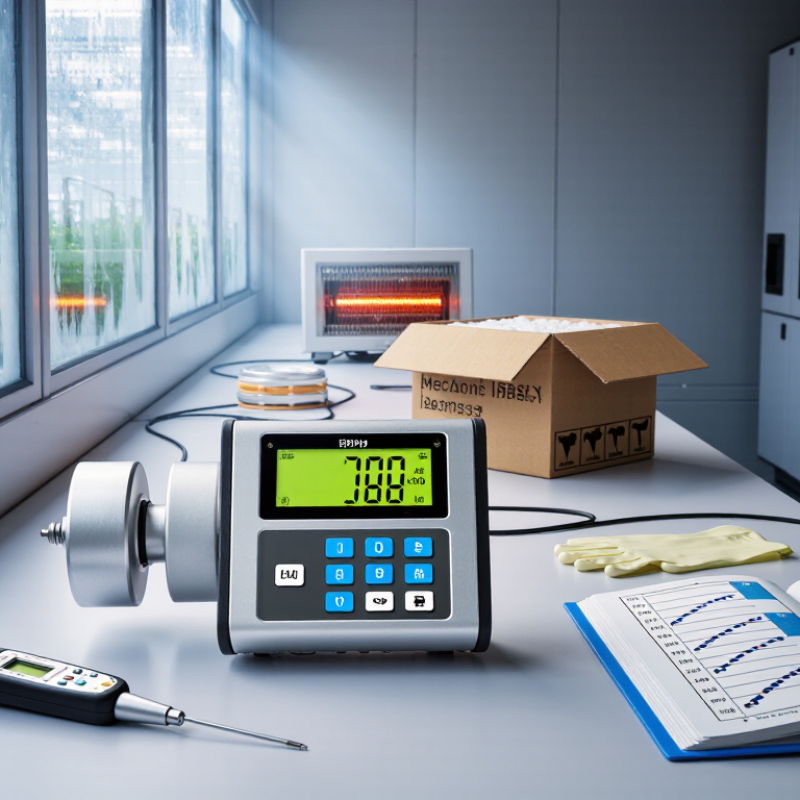
Before choosing a precision humidity sensor, define what “precision” means for your application. Accuracy, resolution, repeatability, and response time are different requirements. A sensor showing 0.01% RH may still have poor accuracy. Specify the acceptable error, such as ±1.5% RH, across the full operating range.
Tip: Write down the actual measurement conditions. Include humidity range, temperature range, pressure, airflow, and expected exposure time. A chamber near 90% RH creates different risks than a dry storage cabinet. Condensation can damage readings or delay recovery. I once treated temperature as a minor variable, and the results became difficult to defend. That assumption needed more attention.
Tip: Test the sensor where it will work. Place it near the product, not only beside the laboratory instrument. Check readings at low, medium, and high humidity points. Allow enough stabilization time before recording data. Short tests can hide drift. Also examine temperature compensation, calibration intervals, and data logging needs. A reliable sensor should provide traceable calibration evidence and clear uncertainty information. Ask how performance changes after repeated humidity cycling. Specifications often look cleaner than real conditions.
Tip: Define failure limits before installation. Decide when an alert, recalibration, or replacement is required. Consider dust, chemicals, vibration, and restricted airflow around the sensing element. These details may reduce accuracy, even in a controlled room. The best choice is not always the sensor with the smallest advertised tolerance. It is the one whose verified performance matches your measurement conditions.
Choosing a precision humidity sensor starts with matching the technology to the measurement task. Capacitive sensors are common because they respond quickly and support compact designs. Resistive sensors can be economical, but temperature and contamination may affect their readings. Chilled-mirror instruments measure dew point directly and often serve as reference equipment, although they need more maintenance.
Accuracy is not the same as repeatability.
Accuracy describes closeness to a trusted reference. Repeatability describes how closely the sensor returns to the same value under unchanged conditions. Check both specifications at your actual temperature and humidity range. A sensor rated at 25°C may perform differently inside a cold storage room. Read the full calibration certificate. Do not rely on one headline number.
Look for hysteresis, drift, response time, and long-term stability. Place two sensors beside each other for several hours. Their readings should converge within the stated tolerance. Then expose them to a controlled humidity change and record recovery. Small differences matter. A 2% relative humidity shift can affect drying, material testing, or environmental control. Consider factory calibration, field adjustment, replaceable probes, and data logging. I once treated response speed as the main advantage, but slow thermal equilibration caused larger errors than expected. That was a useful correction. Installation details matter too. Avoid direct airflow, condensation, and heat from nearby electronics. A practical sensor is not always the most accurate sensor.
Choosing a precision humidity sensor starts with the measurement task, not the catalog page. In a calibration room, a fast sensor can reveal a sudden moisture leak within seconds. That speed matters. However, rapid response may become noisy when airflow changes around the probe. Test the stated response time under real air movement, temperature, and filter conditions. A number measured in still air may disappoint inside a chamber or duct. Check whether response time means 63% of the final reading or another test point.
The humidity range should cover actual extremes, with extra margin for unexpected conditions. A sensor rated near 95% relative humidity may struggle when condensation forms. Check recovery time after exposure to saturated air. Low-humidity performance also deserves attention, especially in storage rooms or drying systems. Do not trust the midpoint alone. Compare accuracy across humidity and temperature points. Request calibration evidence with traceable references, not only a single laboratory value.
Environmental stability includes temperature cycling, dust, airflow, and chemical vapors. Review drift data from aging tests and field use. In practical evaluations, mounting position can change results more than expected. A probe near a cold wall may read differently from one placed at the chamber center. Short tests can mislead. Confirm thermal compensation, protective housing, data logging, and recalibration intervals. A stable reading is not always correct.
| No. | Selection Tip | Key Dimension | Practical Target | Why It Matters | How to Evaluate |
|---|---|---|---|---|---|
| 1 | Match the humidity range to the application | Relative humidity operating range | At least 0–95% RH for general monitoring; 0–100% RH when condensation or saturation may occur | A sensor operated near or beyond its specified limits may show increased error, slow recovery, or long-term drift. | Compare the complete operating and accuracy ranges with the expected minimum, maximum, and condensation conditions. |
| 2 | Prioritize response time for changing conditions | Humidity response time, typically T63 | About 5–15 seconds for fast process monitoring; up to 30–60 seconds may suit room or storage monitoring | A fast response captures short humidity excursions and improves control-loop performance. | Check the test conditions, airflow, filter type, and whether the stated value represents T63 or another response-time definition. |
| 3 | Check accuracy across temperature | RH accuracy and temperature compensation | Approximately ±1.5–3% RH over the specified temperature range; tighter tolerances require calibration | Relative humidity depends strongly on temperature, so uncompensated temperature changes can create significant measurement error. | Review accuracy graphs rather than relying only on a single typical value at room temperature. |
| 4 | Evaluate environmental stability | Long-term drift, hysteresis, and condensation tolerance | Low annual drift, typically below 0.5–1.0% RH per year under rated conditions | Stable output reduces recalibration frequency and helps maintain reliable trends in long-term installations. | Look for published drift, hysteresis, recovery, and repeated high-humidity test data. Confirm whether condensation exposure is permitted. |
| 5 | Select an appropriate temperature range | Operating temperature and measurement accuracy | At least −40 to 85°C for industrial use; narrower ranges may be sufficient for indoor applications | Temperature extremes can affect accuracy, response time, packaging, and sensor lifetime. | Verify the rated range for both the sensing element and the complete assembled probe, including cables and electronics. |
| 6 | Choose suitable output and resolution | Interface, resolution, noise, and update rate | At least 0.1% RH resolution for precision monitoring; digital output preferred for longer cable runs | Resolution is not the same as accuracy, but insufficient resolution or excessive noise can hide meaningful humidity changes. | Confirm the interface, supply voltage, signal integrity, update interval, cable length, and actual noise level in the final system. |
| 7 | Plan calibration and serviceability | Calibration interval, traceability, and field replacement | Annual verification is common; use shorter intervals for regulated, critical, or chemically harsh environments | A practical calibration process protects measurement confidence and lowers downtime over the sensor’s service life. | Check calibration certificates, adjustment capability, replaceable filters, access to reference standards, and documented recalibration procedures. |
Note: Performance targets are practical selection guidelines. Actual specifications should be verified against the sensor’s datasheet, test conditions, installation method, and application requirements.
7 Tips for Choosing a Precision Humidity Sensor
Check calibration records before comparing specifications. WMO-No. 8 stresses traceability, uncertainty, and documented verification for reliable atmospheric measurements. Choose a sensor with a stated accuracy, test range, and calibration method. Ask whether the certificate covers your actual humidity range. A laboratory certificate is useful only when conditions match your application. Start with traceability.
Check compatibility with controllers, data loggers, wiring, and communication protocols. Confirm supply voltage, output type, response time, and enclosure rating. Fit matters. A sensor may measure accurately but fail inside a wet, dusty chamber. For indoor monitoring, the U.S. Environmental Protection Agency recommends maintaining 30–50% relative humidity, while keeping levels below 60% helps reduce moisture-related risks. Select a range that remains stable beyond your normal operating point.
Plan maintenance before installation. Review drift specifications, replacement access, cleaning needs, and recalibration intervals. WMO guidance supports routine checks because contamination and aging can weaken measurement confidence. Keep spare probes when downtime is costly. Small errors accumulate. My early evaluations focused too heavily on initial accuracy and ignored recovery after condensation. That was a mistake. Test real operating cycles, including dry storage, sudden humidity changes, and repeated cleaning. Record readings against a reference instrument, and investigate unexplained differences instead of quietly averaging them.
Check calibration, compatibility, response time, operating range, drift, installation conditions, and long-term maintenance requirements before selecting a sensor.
Reference values show the approximate water-vapor content of air at 25°C and standard atmospheric pressure. Use the full expected humidity range when checking sensor calibration, temperature compensation, and compatibility with the application environment.
Choosing a precision humidity sensor starts with the application, not the product sheet. In a controlled room, a one-percent error can affect storage, testing, or process stability. The U.S. Environmental Protection Agency recommends maintaining indoor relative humidity between 30% and 50%. This range gives a useful reference point.
Tip 1: Define the working range, accuracy, response time, and acceptable drift before comparing prices.
Tip 2: Check calibration evidence. The World Meteorological Organization’s Guide to Instruments and Methods of Observation emphasizes traceability, uncertainty, hysteresis, and response time. A sensor with ±1% RH accuracy may still perform poorly after contamination or condensation. Ask for calibration intervals and test conditions. Cheap sensors can become expensive. I still over-specify sometimes. That mistake increases installation costs without improving the measurement.
Tip 3: Match the sensor to the environment. For clean laboratories, stable polymer sensing elements may be sufficient. High-temperature ducts, compressed air, and frequent condensation require stronger protection and suitable mounting.
Tip 4: Compare total ownership cost, including calibration, replacement access, wiring, and downtime.
Tip 5: Test reliability under real conditions. Record readings beside a traceable reference during temperature changes. A smooth display is not proof of accuracy.
Tip 6: Review digital communication, alarm functions, and data logging needs.
Tip 7: Select a supplier with clear technical documentation and responsive support. WMO guidance also stresses documented uncertainty, which is often ignored during procurement.
Match the technology to the measurement task. Capacitive sensors respond quickly and fit compact systems. Resistive sensors may cost less. Chilled-mirror instruments measure dew point directly but need more maintenance.
Accuracy means closeness to a trusted reference. Repeatability means returning to similar readings under unchanged conditions. They are different. Check both at your real temperature and humidity range.
Not automatically. Performance may change outside the stated test conditions. Review the full calibration certificate and verify results in the cold room.
Check hysteresis, drift, response time, and long-term stability. Also review uncertainty and calibration intervals. One headline number is not enough.
Place them beside each other for several hours. Compare their readings within the stated tolerance. Then create a controlled humidity change and record recovery.
A 2% relative humidity shift can affect drying, material testing, or environmental control. Small shifts matter. A smooth display does not prove accuracy.
Avoid direct airflow, condensation, and heat from nearby electronics. Allow enough time for thermal equilibration. I once trusted fast response too much. Slow temperature adjustment caused larger errors.
Include calibration, replacement access, wiring, maintenance, and downtime. A cheap sensor can become expensive. I still over-specify sometimes, and that can raise costs without improving measurements.
Choosing the right Precision Humidity Sensor begins with clearly defining your accuracy requirements, measurement environment, humidity range, temperature conditions, and installation needs. Different sensing technologies offer varying levels of accuracy, repeatability, response time, and stability, so compare their performance under both normal and challenging operating conditions. A reliable sensor should deliver consistent readings, respond quickly to changes, and remain stable when exposed to temperature fluctuations, dust, condensation, or continuous operation.
Calibration, system compatibility, and long-term maintenance are also essential considerations. Check whether the sensor can integrate with your control system, whether calibration is simple and traceable, and whether replacement or servicing will be convenient. Finally, evaluate the total cost of ownership rather than focusing only on the purchase price. The best choice will balance measurement precision, durability, reliability, maintenance requirements, and application-specific performance, ensuring dependable humidity monitoring over time.

YCLH Sensor